
Well, I think I figured it out. I think I made Zoom useful.
I teach a variety of college writing and media design classes: first year composition, technical writing writing for the web, web design with WordPress, classes on Creative Cloud… If it’s about producing content, I probably teach it.
I decided that it’s time to start recording what I do for the classroom (not necessarily in, as there are plenty of blogs and journals just for that). Partly because I feel like I’m always making band-aids for tools, and partly because I need to document those band-aids.
So, if you use Zoom and record your classes, maybe this will be useful for you too!
The Problem
Before I get too far, I probably ought to define the problem I’m solving. I mean, Zoom does work really well as a videoconference tool. That’s what it’s designed for, and I understand why I’m using it to teach classes remotely. But, I end up with two options for designing each class session:
- Do class as close to normal as possible — small and large discussions, visuals generated on the fly (writing on the board, generating documents and examples in response to class input), something pretty dynamic.
- Do class in a way that would be easier to record.
If you’ve got more than a dozen people on one call, it really is either/or, especially if you consider students’ bandwidth and potential data allowance. That link notes that the lowest quality video stream consumes more data per hour than my wife and I used to share per month when we got our first smartphones.
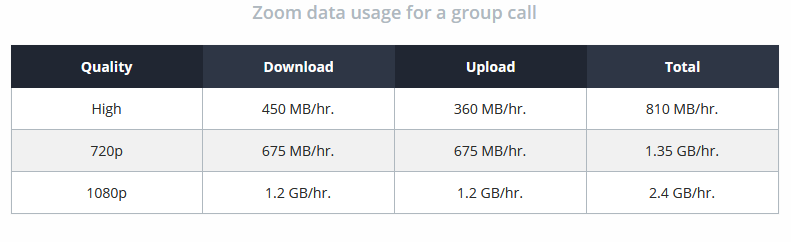
A really good stream, necessary to spot the details when I’m working in Adobe UIs, will consume more data per hour than my wife and I shared just a couple of years ago. On a light teaching day, if I had to do Zoom off my cell data (something that happens more frequently when my colleagues are also hosting Zoom meetings from nearby classrooms), I’d eat all of my family’s data for the month before the end of my second class.
Boo hoo for me, right? But, I teach in rural Oregon, where internet connectivity isn’t great. I don’t know whether my students can deal with me sharing my desktop for 50-80 minutes at a time in an attempt to make a more visible whiteboard.
Why not drop the visuals, or simply limit them to a few pictures I can share before class? Just talk?
Well, that turns into a lecture pretty fast. Even now, I’m lecturing more than I want to — talking at is a pretty crummy way to teach people communication skills of any kind.
So, my problem can really be summarized in a few components:
- I need to share visuals with students in a form that takes the least data transfer possible
- I need to be able to generate visuals dynamically in response to class discussion
- I need to be able to capture those videos in Zoom
Existing Workflow
No problem gets found in a vacuum. Well, no problem other than markers and dice, which will instantly cause a problem with your vacuum.
Get it? I’m also a dad, if you can’t tell.
I already had a workflow set up, since I’m expected to post all recorded class Zooms in a place where students can access them, and I need to record any class where at least one person Zooms in, and I keep a flexible attendance policy so anyone can Zoom in any time for any reason.
I don’t want to keep track of doctor’s notes. Do you?
So, every recording goes up on the learning management system. Cool.
Remember that thing I said about teaching Adobe products? Premiere is one thing I teach. Like most teachers, I get pretty upset when people do the thing I teach badly, even moreso when I do it badly. So, I’m not going to post a Zoom recording with dead time before class begins, silent video during small group discussions, or chunks of me responding to text chat that isn’t recorded by the software. That’s just not user friendly.
I process every class video to remove the negatives and add things to make it more usable. Toss in an easter egg every once in a while to get students mentioning them in class, and suddenly a thing I’m required to do is a useful tool people actually check out. (Maybe another post will talk about using YouTube and its analytics for class materials.)
But, you know what? Processing video takes a long time. As a matter of fact, I’m writing this blog post because I’m waiting for Premiere to finish encoding the video from my last class from today, and before that, I spent about 20 minutes just chopping out dead spots and making the chat visible on the video. That might not seem like a long time, but that’s after I figured out the process below. Before that, an hour of class could take 90-120 minutes to edit before encoding it.
The Solution
The recipe for this fix is pretty simple: you need Zoom (I suppose any videoconference tool will work), a screen recorder (I highly recommend OBS) and a video editor (I use Premiere, but you could just as easily use Da Vinci).
Set Up Your Videoconference Tool
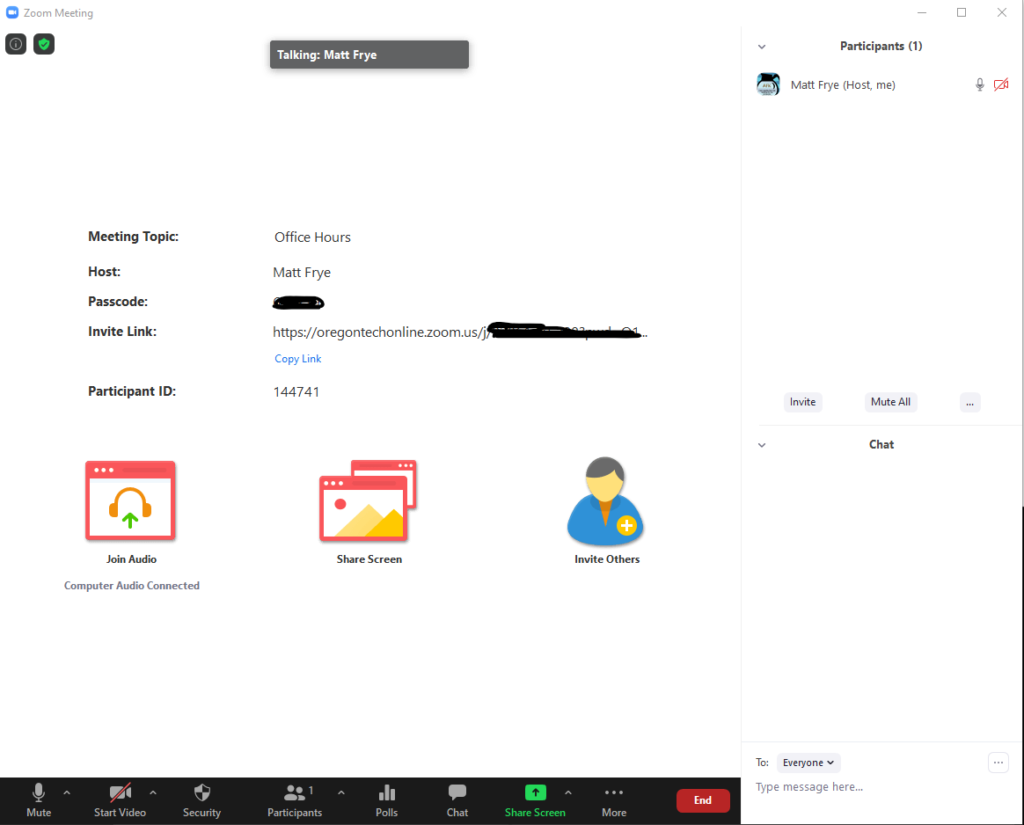
This step is fairly easy. Just get your video conference tool in a place where you are unlikely to resize it during a class or other meeting. I use two monitors when I’m teaching from home, so I keep Zoom on my secondary screen.
While you’re getting set up, make sure that Chat panel is visible.
Set Up Your Screen Recorder
This one’s a little more complicated, and it’ll depend on your recorder.
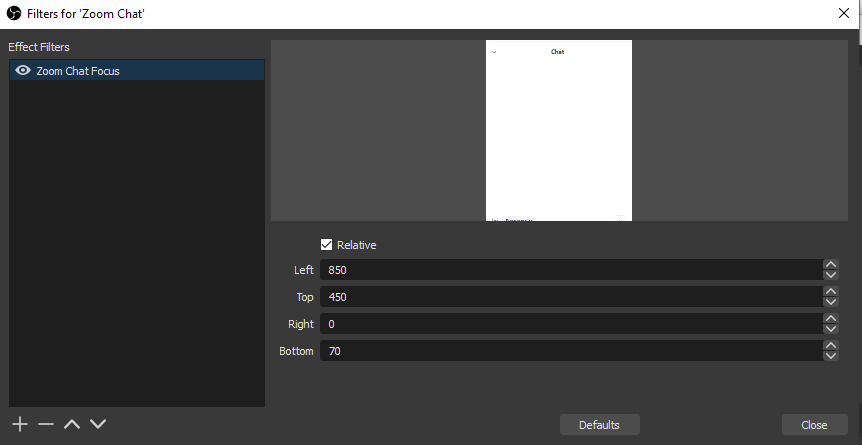
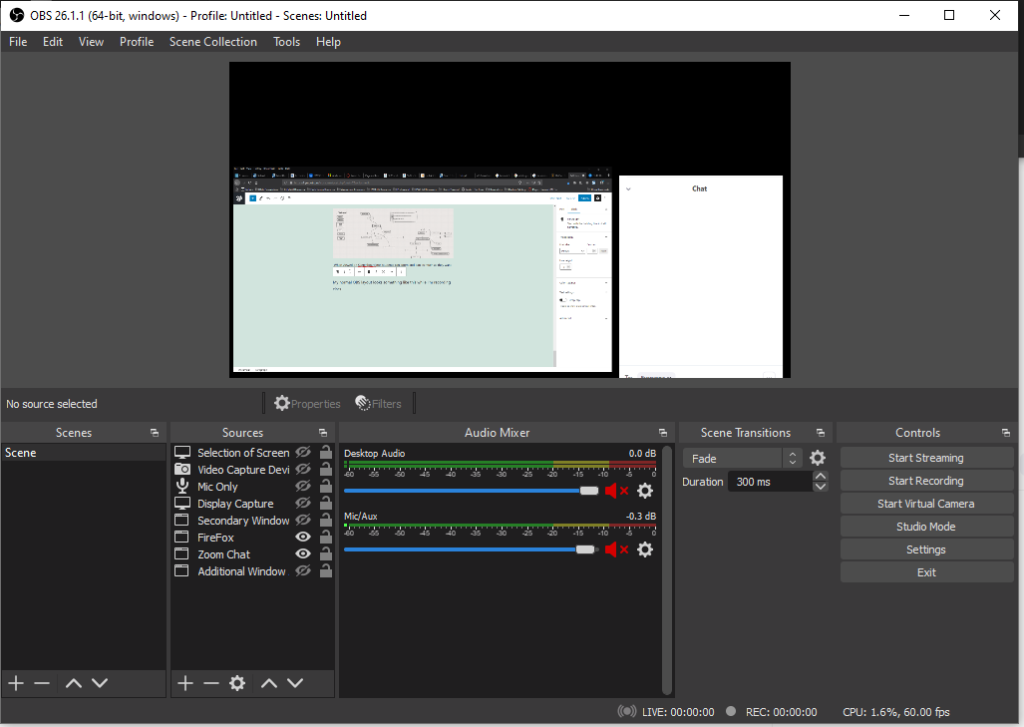
I use OBS, so I’ve added Zoom as a specific source (Window Capture > Match title “Zoom Meeting”), then added a crop filter. This is where it’s important to not resize Zoom during a meeting. The crop values don’t change with the window, and you might end up cutting off part of your chat.
Next up, set up another Window capture (or as many as you want) for the programs you’re going to be sharing in class. I’ve offloaded a lot of my whiteboard needs to websites like Sketchboard.me, so I can have that whiteboard on display without eating up anyone’s data.
For reference, this whiteboard is 27mb for me as the creator (which adds more to my overhead than to people who just view it). We used it today for about 30 minutes. According to the table above, someone streaming this screen at the lowest resolution would eat up about 400mb of data.
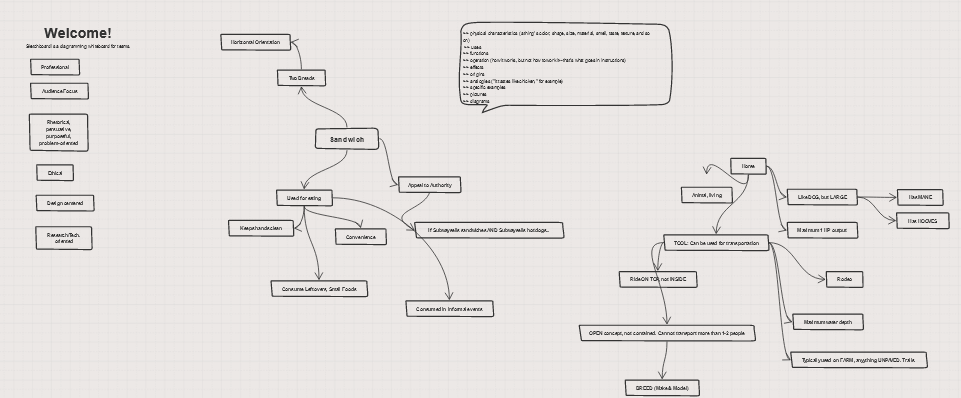
My normal OBS layout looks something like this while I’m recording class.
Dual Capture
When recording a class, I record two things at once: the Zoom recording and the screen recording. Before things get started, I’ll pop a simple message into the chatbox, like {start}. This gives me a timestamp in both videos that I can line up in Premiere, allowing me to layer my screen capture on top of our class recording.
Layering in Premiere
With some basic editing in Premiere, you just need to stack one video on top of the other.
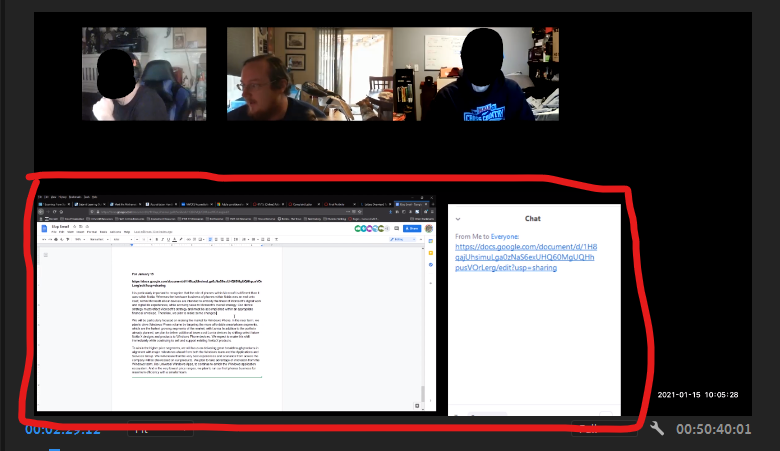
Now, this layout doesn’t always work. Sometimes, the middle space will be faces or other elements you want to preserve. But, having saved everything in the screen recording, you can again crop or mask parts of each video as necessary to get all of the important content on the screen.
The Benefit
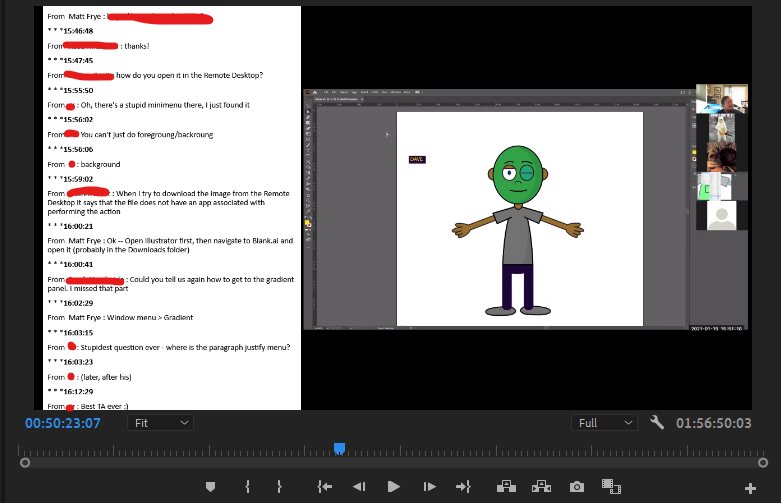
Now, when I go to edit, I have two video tracks that can be synchronized easily. I can keep the chat on display, which is handy for folks who don’t use a mic for any reason. Once the tracks are synced, I can cut out dead space as necessary so long as I cut from both.
And, like I said, this cuts down my editing time pretty tremendously. Today’s classes generated 4.5 hours of video, and I had it all pushed into Media Encoder in under an hour of editing. They might not be pretty, but they’re usable.
